Thursday, March 23, 2006
Oracle TDP and HACMP 5.3 Incompatibility Resolved
Well I was have a heck of a time with this problem. It seems the 5.3 HACMP binaries are incompatible with the Oracle 64-bit API so the TDP would crash when attempting to backup a DB on a cluster. I was expecting a fix and was told it would be available by January. So I waited, and watched and never saw an update to the TDP. Frustration mounted until I was able to get ahold of a TDP developer who pointed out that it was the HACMP side that had to do the patching and now all is well. So if you are looking to use HACMP and backup Oracle DB's with the TDP make sure they have the latest patch levels installed or the 64-bit API will not work.
Thursday, March 16, 2006
TSMExpress Update
Yesterday I sat through a TSMExpress presentation and thought I would explain the product to those of you interested. First off TSMExpress is a Windows only product and has limited support for applications (basically Exchange and SQL). TSMExpress will only support a 20GB DB and ALL BACKUPS GO TO DISK! Yes that’s right; there is no direct backup to tape option. What TSMExpress utilizes is the backupset function that has been updated to enhance the backupset catalogue to be more like BackupExec or Arcserve. This is how TSMExpress will handle the Grandfather, Father, Son process of backup. Here is how it works, TSMExpress backs up all data to disk and keeps the data on disk for up to 14 days. What I haven’t got an answer to involves the disk pools and their use of the FILE device class. TSMExpress, from what the presentation showed, use the normal TSM disk pools but instead uses the FILE device class. According to the presentation the FILE device class can span drives (currently on TSM it cannot since you have to state a single drive/folder location for the files to be created.
TSMExpress’ tape creation and handling is also a little different in that is doesn’t use tape pools like we know them in TSM. There are no primary and copy tape pools, to put the data out to tape you generate a backupset (they call it a media copy). TSMExpress allows for multiple backupsets on a tape so tape usage won’t be as bad as you might have been thinking, and they have enhanced the restore process so backupsets can be explored on the file level through the GUI. The other nice feature is that if the TSMExpress DB was ever corrupted or unable to be restored it can be recreated through the backupset catalogues (interesting feature). So once the data is on tape you send it offsite and the backupsets become your DR solution.
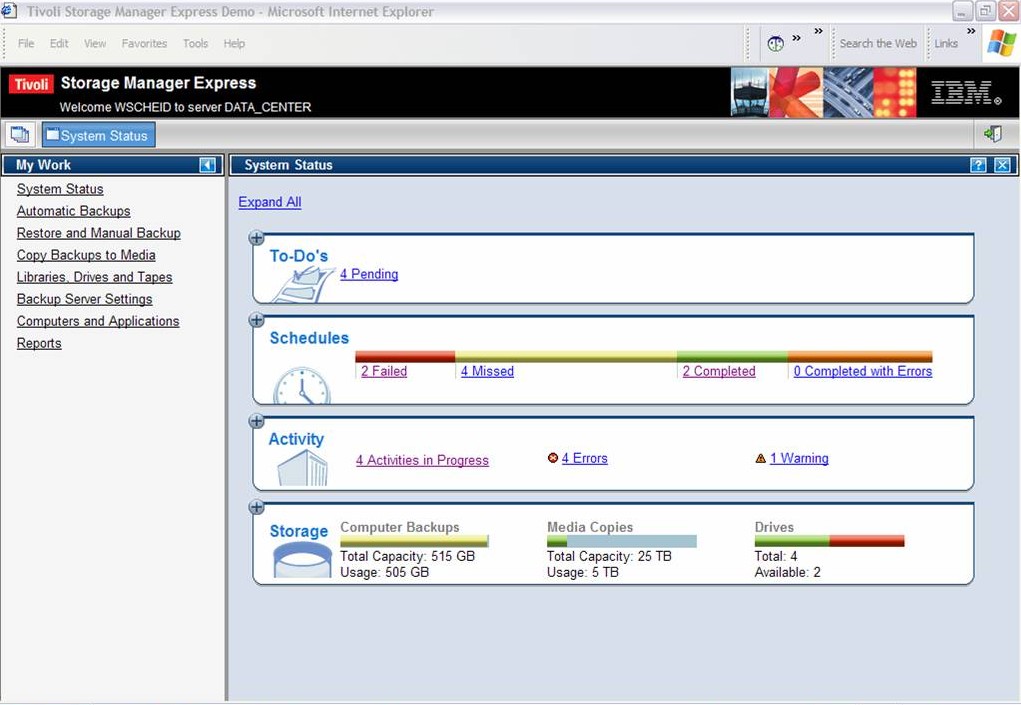
TSMExpress is expected to be upgradeable to TSM by next year but currently it cannot upgrade to its beefier older sibling. The backupsets are transferable, however, so you can move data between products in that way. The web interface is also a “Dummies” version and is very easy to work with as you can see it’s pretty basic. What I didn’t hear was whether the web interface was integrated or part of the ISC. I will have to ask around on that one. Overall I would say TSMExpress looks to be a good product to fill a much needed role for the SMB market.
Monday, March 13, 2006
How To Setup A Library Manager Instance (Revised)
I had to revise this as I left out the checkin of the tapes before the audit. I had to do this process this weekend as we moved to a new library and library manager and I realized I left out the tape checkin.
I was recently asked how to setup a dedicated TSM Library Manager instance to resolve issues with using a production backup instance as the manager. There are definite benefits to using a dedicated instance like performance and manageability. Performance wise TSM has DB issues and when large tasks are running all around performance is impacted. This impact affects library usage and so having the dedicated library manager allows for a smaller DB and no heavy tasks to bog down all the mount requests. Manageability is increased in that all you need to worry about are the drives and their paths. That’s right, no backups to worry about (except the DB) and even if you lost the systems DB backup and had to start from scratch the other servers sharing this instance could easily reconcile their inventory and you would not lose any server data (so it’s also a lot safer to use than relying on a production TSM instance). If this instance is on a dedicated server also, do not backup the server to the library manager, back it up to one of the other instances. NO BACKUPS OR ARCHIVES SHOULD BE DONE TO THIS INSTANCE. The key to the dedicated instance is keeping the DB as small as possible and this is easily done if nothing else in run on the instance. When creating our library manager instance I was unsure how large to make the DB so I made it 2GB, and it currently is 4.6% utilized. The instance starts fast and cycling it for updates or when problems occur keeps downtime to a minimum. Ok so here are the steps to setup the instance, just remember there will be an outage needed on the current TSM library manager as you remove drives and paths.
Step 1: Create the dedicated instance
You can create the instance fairly quickly by creating a subdirectory on the TSM server like so:
mkdir /usr/tivoli/tsm/libserv/bin
Copy the dsmserv.opt and if planning to use the old web interface the dsmserv.idl file to this new directory. Then define a DB and Log volume either using raw logical volumes or us dsmfmt to format one. Depending on your library size I would make it 500MB to be safe. At that size its space should not be too much of a premium. The log can be half that and still function fine. If you want to be extra careful you can be like me and make it 1-2GB but again my DB is barely used at that size. Once you have created the volumes then you need to run dsmserv format to initialize the instance. If the instance is going to be on a server with other TSM instances you’ll need to export TSM variables so they point to the new /usr/tivoli/tsm/libserv/bin directory. Export the following variables before running the dsmserv format command:
export DSMSERV_CONFIG =/usr/tivoli/tsm/libserv/bin/dsmserv.opt
export DSMSERV_DIR=/usr/tivoli/tsm/server/bin
export DSMSERV_ACCOUNTING_DIR=/usr/tivoli/tsm/libserv/bin
Now you can run dsmserv format and the instance will be initialized and ready to be used. In the ../libserv/bin directory you should now have a dsmserv.dsk file that lists this instance’s DB and Log files. You can at this point either use the instance as is or load the old web interface definitions so that they are available to those who prefer it over the ISC. Once ready to use you can now start the instance and setup its settings for Server-to-Server communication. Remember the other TSM instances have to be able to talk to this instance. Make sure you set the HL and LL address, set the server password, set the server name, the URL, and don’t forget to set crossdefine to ON.
Note: The next step can be done ahead of time if you can allow for a longer library outage.
Once you have set the parameters you feel are necessary, whether for security or event and actlog retention, you can then move over to the current TSM library manager and begin removing the paths and then the drives (in that order). TSM does not like conflicts so don’t try to define the drives on the new Library Manager ahead of time as you could cause serious problems with the library. Delete all paths and drives then delete the library path and finally delete the library itself. You can no longer use this library definition since it is an automated library and when sharing the library the non-library manager TSM instances use a Shared library definition.
Step 2: Define server to server communication for all servers sharing the library
This is quite easy and I wont cover this much as this is fairly straightforward. On all servers that will be sharing the library make sure you have set their server name, server password, HL and LL address, URL, and set crossdefine to ON. Then (using the old web interface) on the servers that will be library clients select Object View -> Server -> Other Servers. Here you can see the servers defined and define new servers. Select Define Server from the drop down menu and then put in the new library managements info into the corresponding fields. Make sure you crossdefine and then your ready to setup the library.
Step 3: Define drives and paths on new library manager
Back on the new library manager instance you can now define the library and the drives and paths. Make sure when defining the new automated library you select the shared option to allow the library to be shared by other instances otherwise it will be accessible only to this instance.
DEFINE LIBRARY ATL01 LIBTYPE=SCSI SHARED=YES AUTOLABEL=YES
Now that the library is defined you need to define the library path and all the drives and their respective paths, this includes the path definitions for every other TSM server that will be using this library. Remember no drive or path definitions are made on the library clients. The only definitions for the library clients are paths on the library manager. Once the drives and paths are defined you will need to checkin the tapes and audit the library. The library manager should see the tapes in the library when you decide to check them in and now you can progress to the next step. If you have tapes that are moving from another library check them in at this time. You have to make a decision at this point to either checkin the tapes now or wait until the other servers have completed Step 4. When you check them in you should check them in as private then after each TSM server reacquires its tapes you can update the private tapes not owned by any TSM server to scratch. This can be seen when you do a Q LIBVOL and the easiest way to do this is to use a select call to create a list then run the list against a shell script to update each tape.
Here is the select command:
SELECT VOLUME_NAME FROM LIBVOLUMES WHERE OWNER IS NULL
Here is the shell script I use:
echo PROCESSING.........
while read LINE
do
dsmadmc -id=<admin id> -pa=<admin password> upd libvol <library name> $LINE status=scratch
echo $LINE updated
done < $1
Step 4: Define shared library and update device classes
Now that the library clients can communicate with the new library manager you will need to define a new library definition. Know that you can reuse the name from the old library settings you deleted if you like. Here we will be setting up a shared library definition (again from the old web admin interface); select Object View -> Server Storage -> Libraries and Drives -> Shared Libraries. From the drop down menu select Define Shared Library and fill out the needed information of Library Name and Primary Library Manager. The primary library manager info should point to the server name you defined for the new library manager instance. Since the server name you defined has all the TCP/IP and port settings it is important you use the same name as the name given to the new library manager. Once the library definition is created you will need to update the device classes on each library client to use the new library. You can use the old web admin interface selecting Object View -> Server Storage -> Device Classes then select the device class type that was in use (i.e. LTO device class) and update each device class by selecting each one then selecting the drop down menu and choose Update Device Class. Update the library name field and if needed set the mount limit if you don’t want this server to be able to use all the drives in the library. Setting the mount limit is an easy way to pseudo-partition the library when its shared. I highly recommend using the mount limit option to allow each system some dedicated access to drives without having to designate specific drives using set path definitions for each library client.
Step 5: Run AUDIT LIBRARY on each TSM library client
Now that the library clients can see the library manager they need to reconcile the library inventory so they can use their tapes. This can be done by running the audit library command AUDIT LIBRARY <SHARED LIBRARY> CHECKLABEL=YES. This will allow each library client to contact the TSM Library Manager and tell it to reassign its tapes back. This audit should be done periodically to make sure each TSM server sees correct volhistory information. If once the volumes have been reconciled for all TSM library clients and you do not see any scratch, you can run a check-in to allow the scratch volumes to be recognized. One thing to be aware of, on the old TSM library manager you will need to delete all volumes listed as remote. This will free up tapes to go to scratch otherwise you’ll have “phantom” tapes that have no data, are not used in any storage pool for any servers, but will show assigned to the old library manager instance. You can run the following command to delete them from your volume history, unfortunately there is no blanket command that seems to work to remove them all at once:
DELete VOLHistory TODate=TODAY Type=REMOTE VOLume=NT1904 FORCE=Yes
What you will want to do is generate a list of volumes from the old library manager that are in REMOTE status and then run that list through this command to delete the volumes from its volume history file allowing them to go back to scratch status when needed.
I hope you have all found this helpful and if I missed a step please feel free to add your input.
Subscribe to:
Posts (Atom)